Guide
Instructions on how to use Researchvideo 2.0. These instructions are for researchers.
A. Get a new research project and permissions to it
Everything in Researchvideo 2.0 is controlled by detailed permission and workflow models. All content is by default private to only project members and admins. No project content can be published to be viewed without logging in.
STEP 1: Log in for the first time
When you start using Researchvideo 2.0 for the first time, log into the service via the log in button in the top right corner of the page:

Log in is currently possible with JYU credentials (SSO log in). Multi-Factor Authentication is required using DUO Mobile. Select JYU MFA login option. With the first login session, please read data privacy info and grant access privileges.
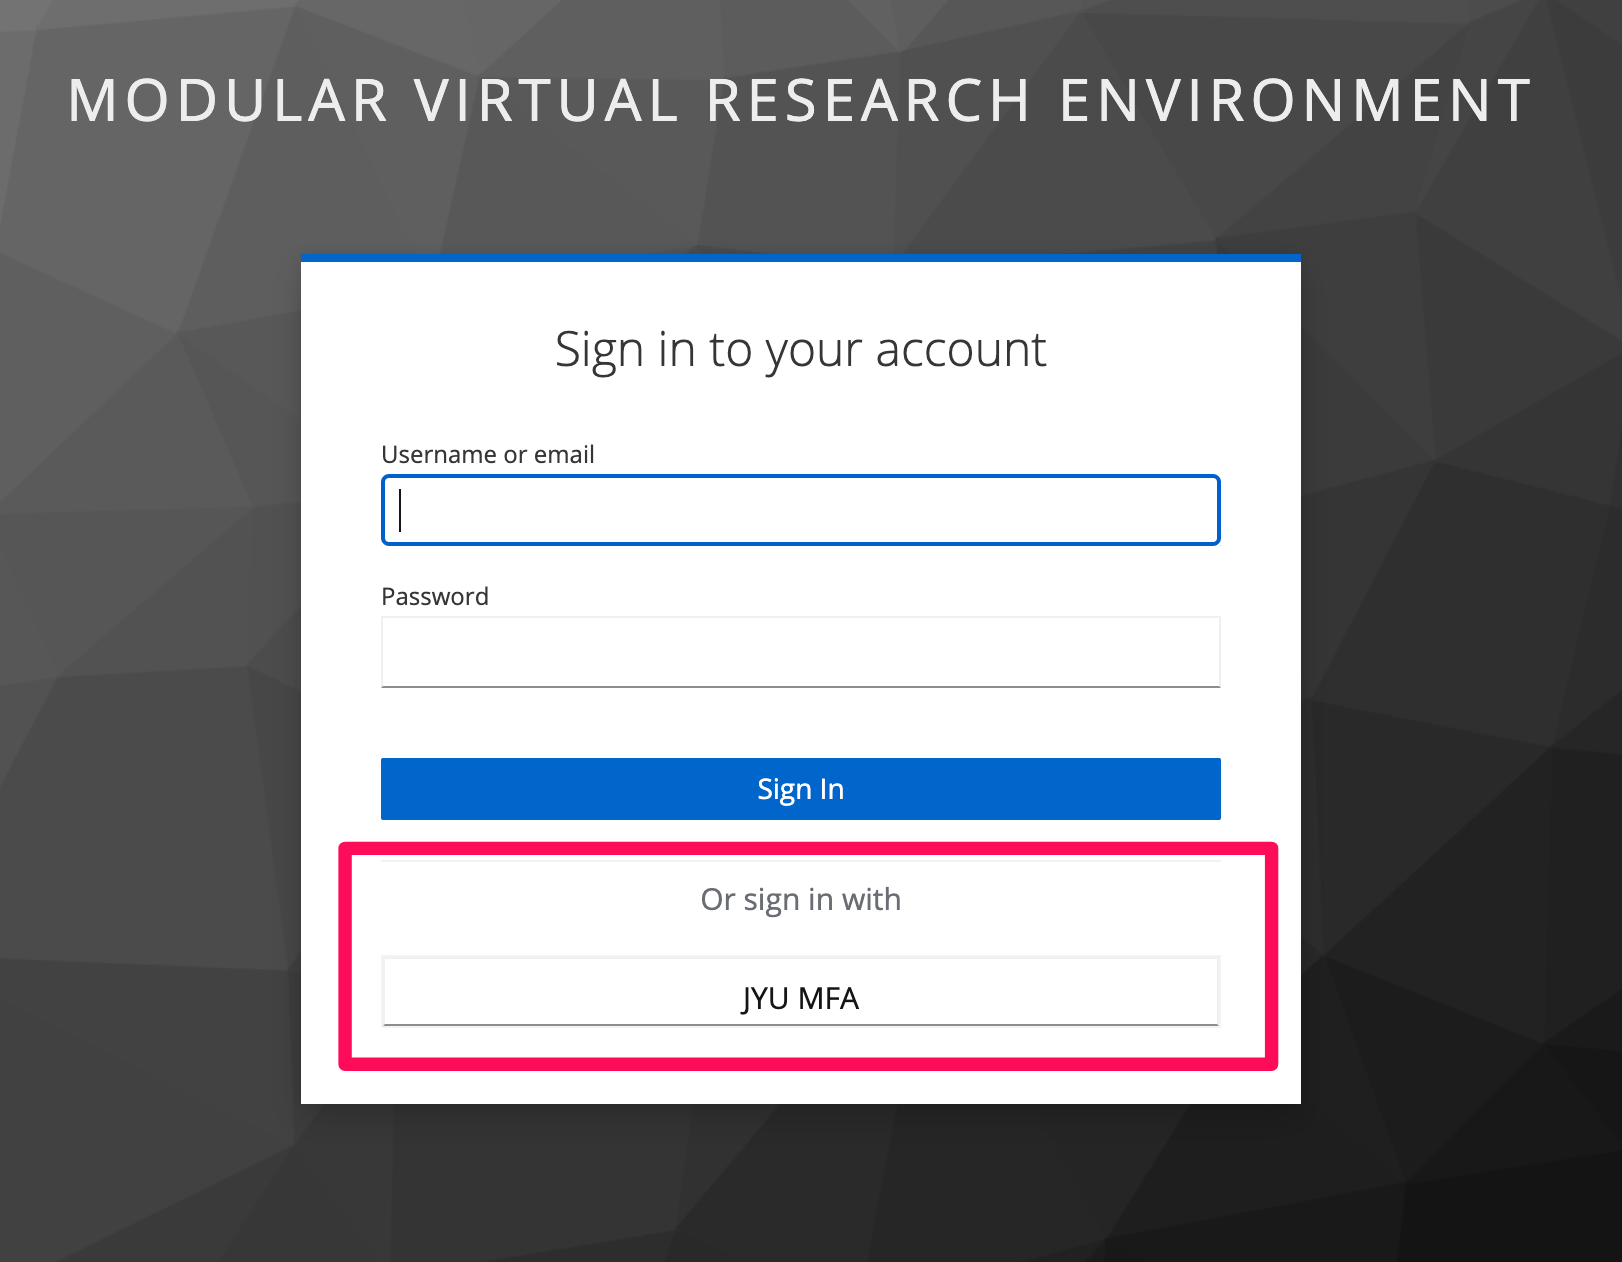
If you do not have JYU credentials, but have Haka credentials via another organization, log in by using Haka authentication. NOTE: Haka authentication is not accessibe yet but it will be available later during 2024.
STEP 2: Apply for a new project
Apply for a new project by sending email to researchsupport-osc@jyu.fi. Include this info:
- Your name
- Project name (an informative name decribes the project's data contents, e.g. Student interviews of [research project's name] project)
- The name of the research project connected to the data
- Brief description of the research video project's data
- Project timeframe
- Which JYU department/unit the data is procuded under
- Names and emails for project members that need permissions to view and edit content. Note: If some members need restricted access to the project (e.g. can only view contents or their access needs to be shorter than the project timeframe), inform of this in the email
- Does the project involve personal data of research subjects? Does it contain special categories of personal data or information on offenses and criminal records? Is the data otherwise sensitive due to it containing confidential information?
- Who are the authors of the research data? Note: If some of the project members do not have JYU credentials, mention also their affiliation and ORDIC iD, if available.
- The planned lifecycle of the data: will it (or parts of it) be archived, published or destroyed at end of the study?
Research data services team from Open Science Centre will then contact you and give you instructions on accessing your Research Video project.
Adding a new member to an already existing project:
1. If they have not done it yet, as the person to log into the service once (see the section above about logging in):
2. Contact researchsupport-osc@jyu.fi and include the following information:
- The name and email of the project member
- The project the person need access to
- The timeframe for the project access
- The types of permissions the member needs (editing/viewing)
B. Add new media pages for video and audio to your project
After getting access to your new research project, you may add new media pages.
Media page is a container for one video or audio file and if necessary, text, images, files. Think of it as a single, editable webpage around a video.
Example video of uploading a video and editing media page in Researchvideo (in Finnish, only for admins).
All your active projects are listed on the My Projects page. You can navigate to it via the top horizontal navigation menu:

Upload a media file
- Go to your project, e.g https://researchvideo.jyu.fi/research-projects/my-new-research-project
- Click the Upload video or audio button and select the file you want to upload

Add details and metadata
- Fill in the Title and Description to your video or audio file

2. Wait for the upload to finish
3. Select needed additional processing like subtitle generation or trimming of the media file. Note: due to ongoing development, this section can have more options than the ones displayed below.

Audio Filters options explained:
- Normalizer = turns up the volume of each media clip so that different videos sound roughly the same. Same gain setting is applied through the whole video (for example gain up by +11 dB) and this function doesn't change the volume differences inside the media.
- Dynamic normalizer = turns up the volume of each media clip and also evens out volume differences (for example, if one person speaks loudly and the other speaker is quieter, this effect tries to raise the volume of the quieter speech to make it sound same as the loud-speaking person).
- Noise reducer = removes unwanted background noise from the media (for example the hum of the ventilation machine, traffic noise...)
4. The encoding process will beging and the progress will be visible

Subtitle generation (automated transcribing) during file upload
If you select the option Subtitle generation when uploading a media file, the program produces an automated transcription of the audio track. After selecting Generate subtitles automatically, you can also choose the following:
- Speech language (also defines the language of the transcription)
- Labeling of speakers (the Label human speech option).
The speech language is selected from a drop down menu where the languages are listed in English.

Subtitle generation (automated transcribing) and translation after file upload
You can also generate subtitles or translations after a media file has been fully uploaded to Research Video 2.0 by doing the following:
1) Navigate to your Research Video Project and select the media file's page you want to create subtitles/translation to.
2) After you have opened the media page, click the edit icon in the left-side menu:

3) Click on the subtitle editor below the streaming window:

4) Go to the right-side menu and select Block:
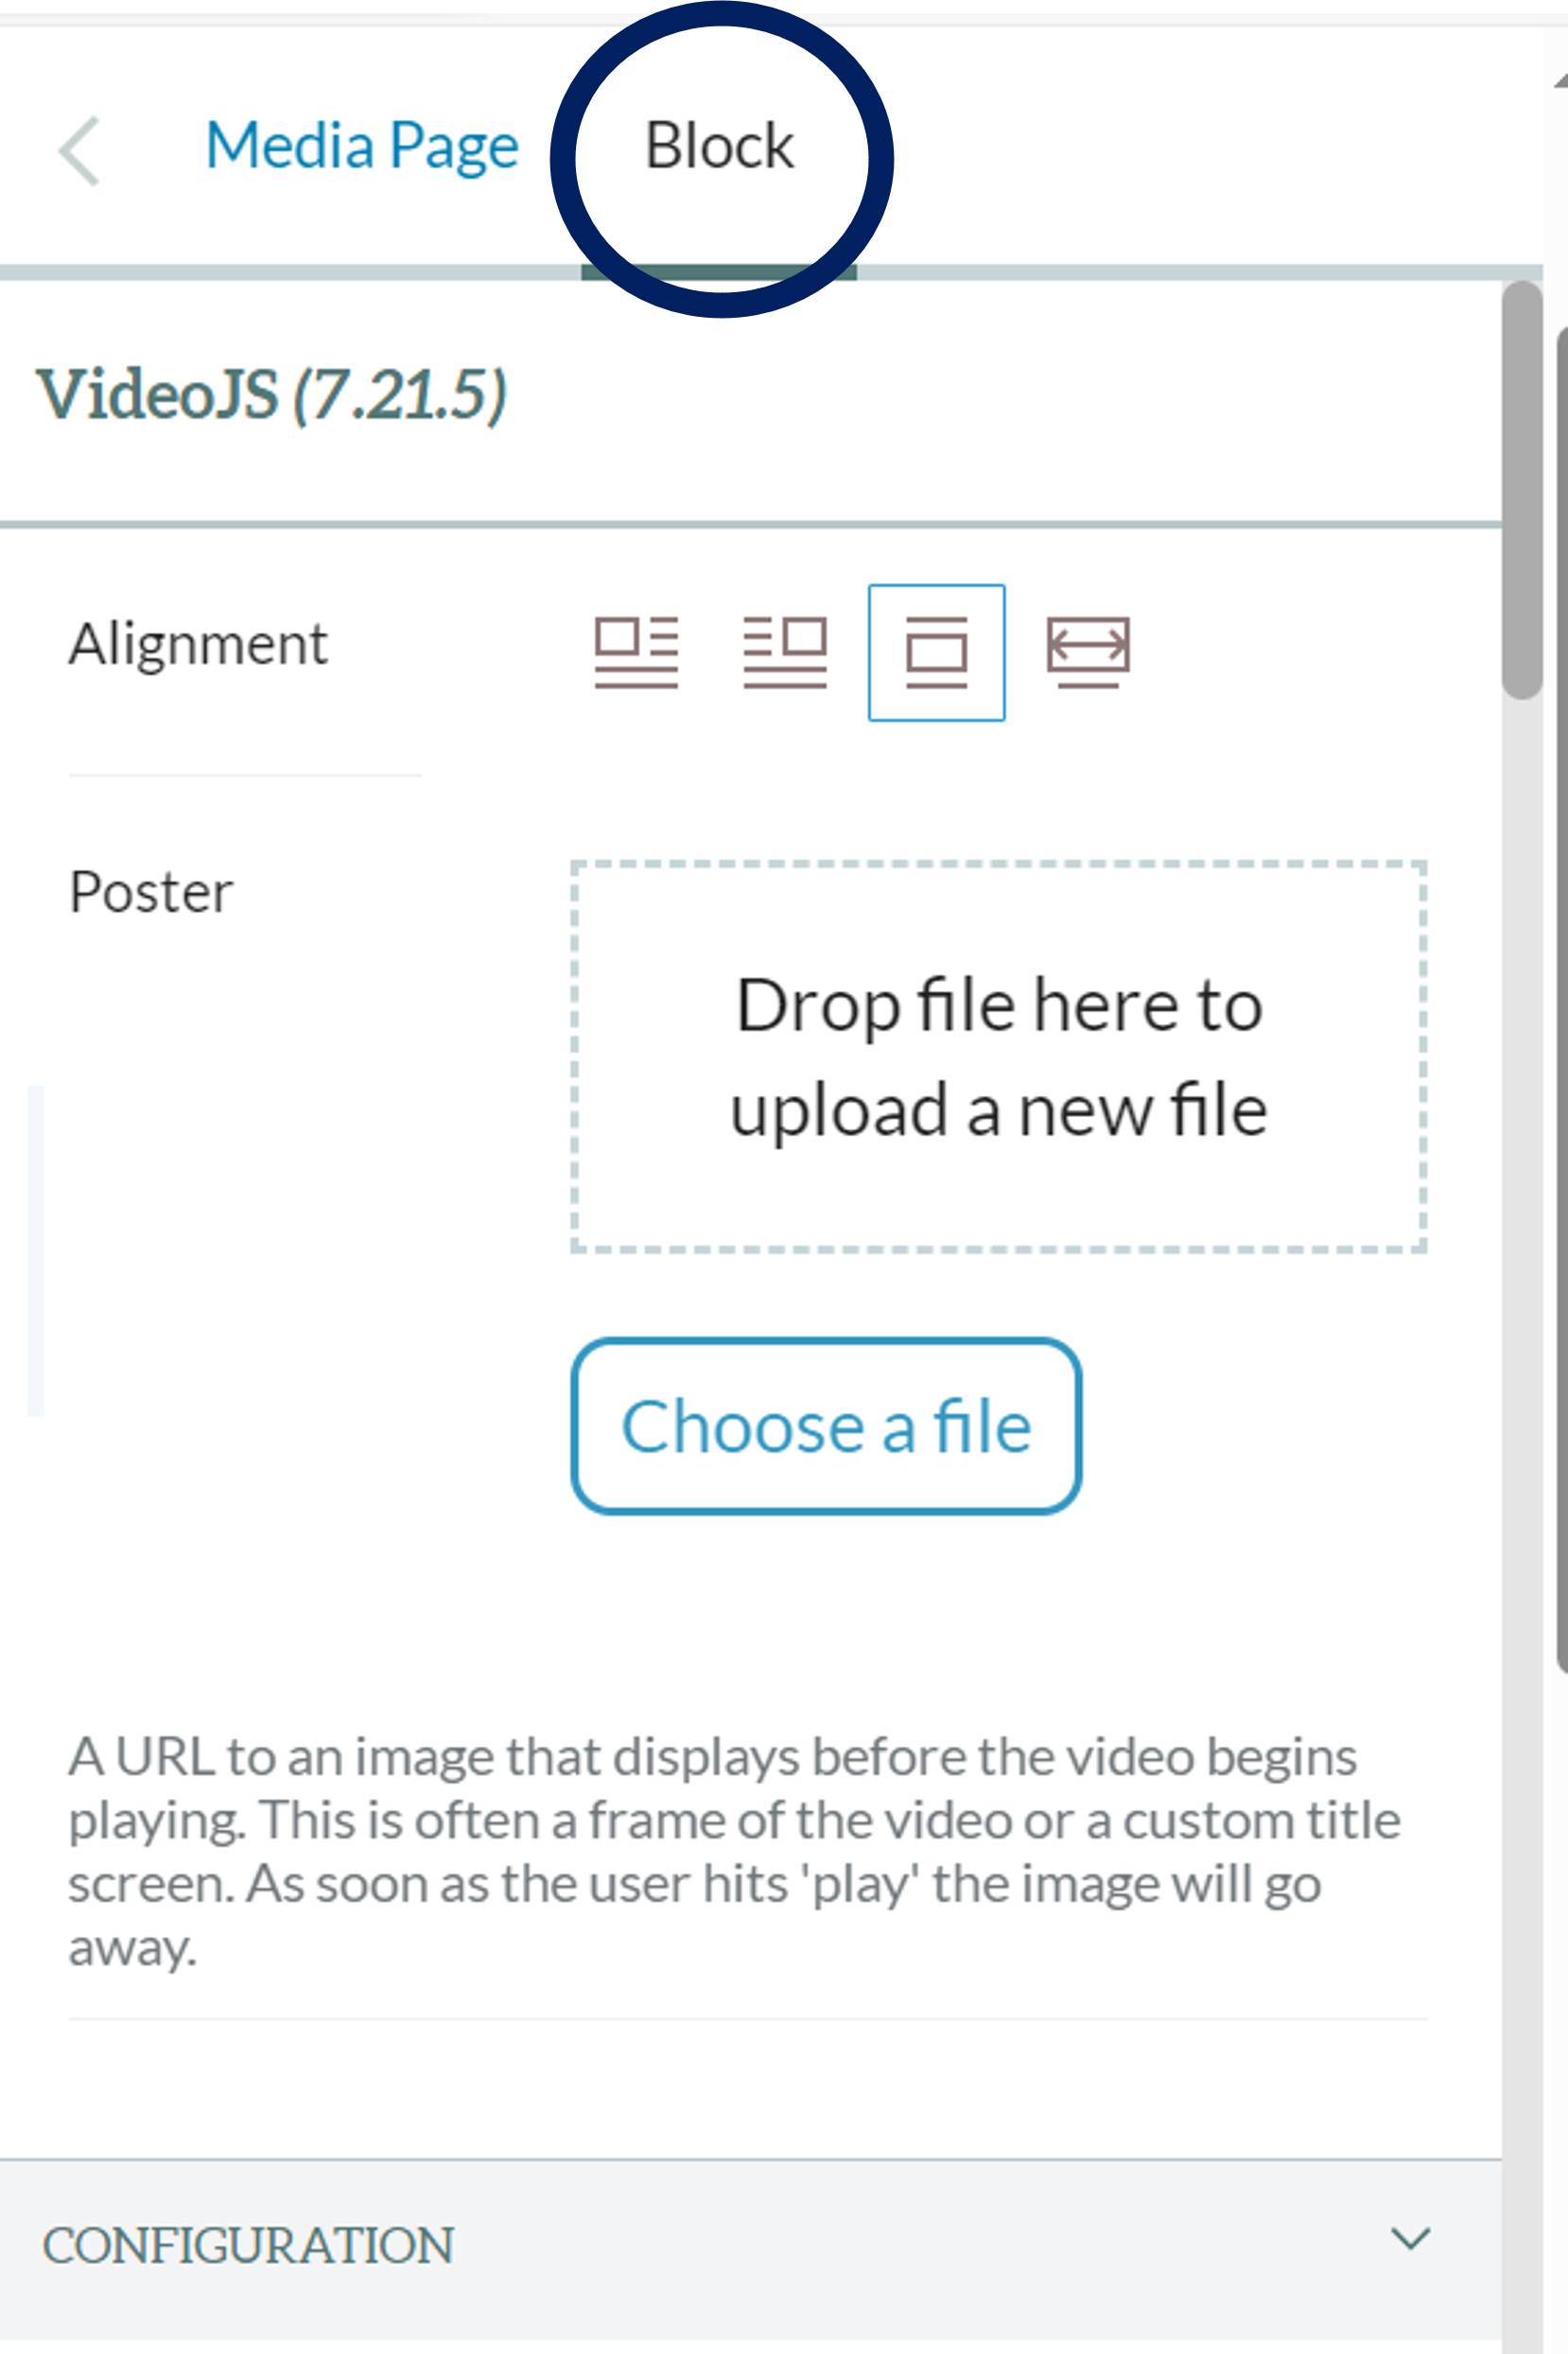
5) Scroll down to the subheading Subtitles:
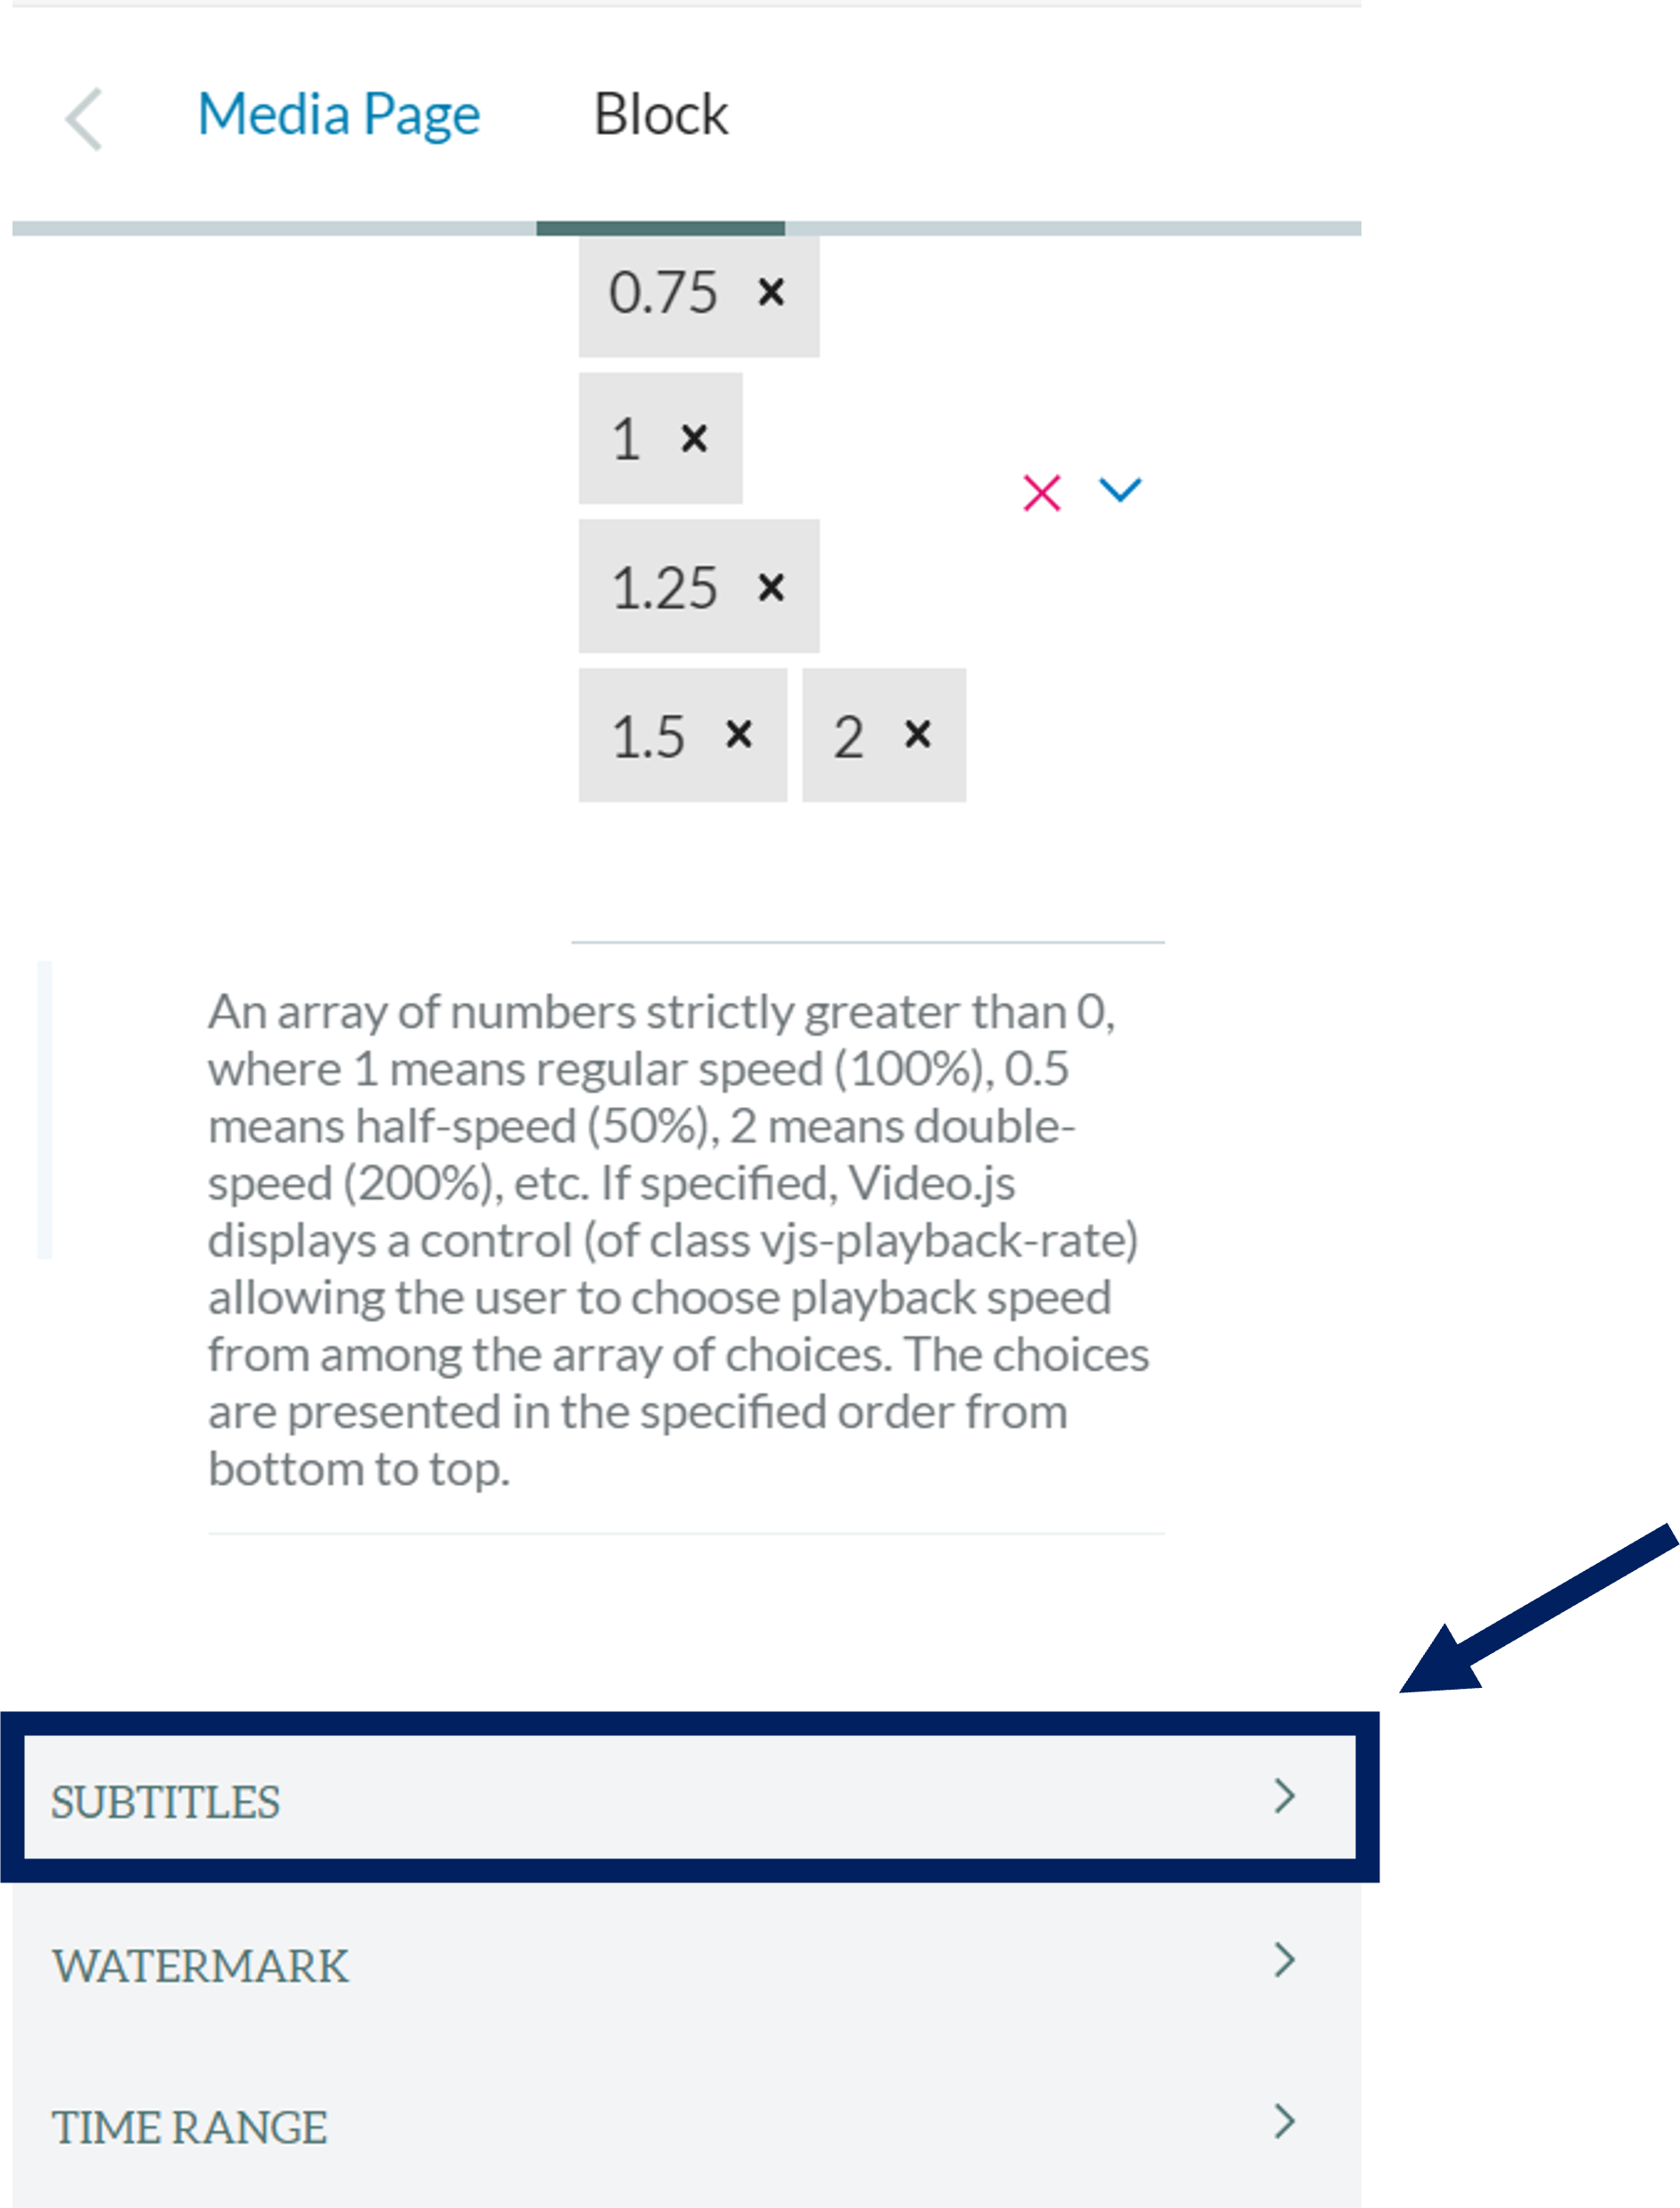
5) Select either Translate to English or Generate Subtitles :

Trimming a media file
You can trim the media file by selecting where the uploaded file starts and ends.
When you have selected the option Trim media, you can do the trimming by moving the yellow markers at both ends of the timeline bar.
NOTE: The media file resolution is lower at this point of the upload but the final upload will include a higher quality version of the file.

Visible progress
After encoding the draft version of the media you can already start editing the media page or view the video.
After all video qualities have been encoded, the page reloads automatically.
The media page is now editable.
C. Edit media pages
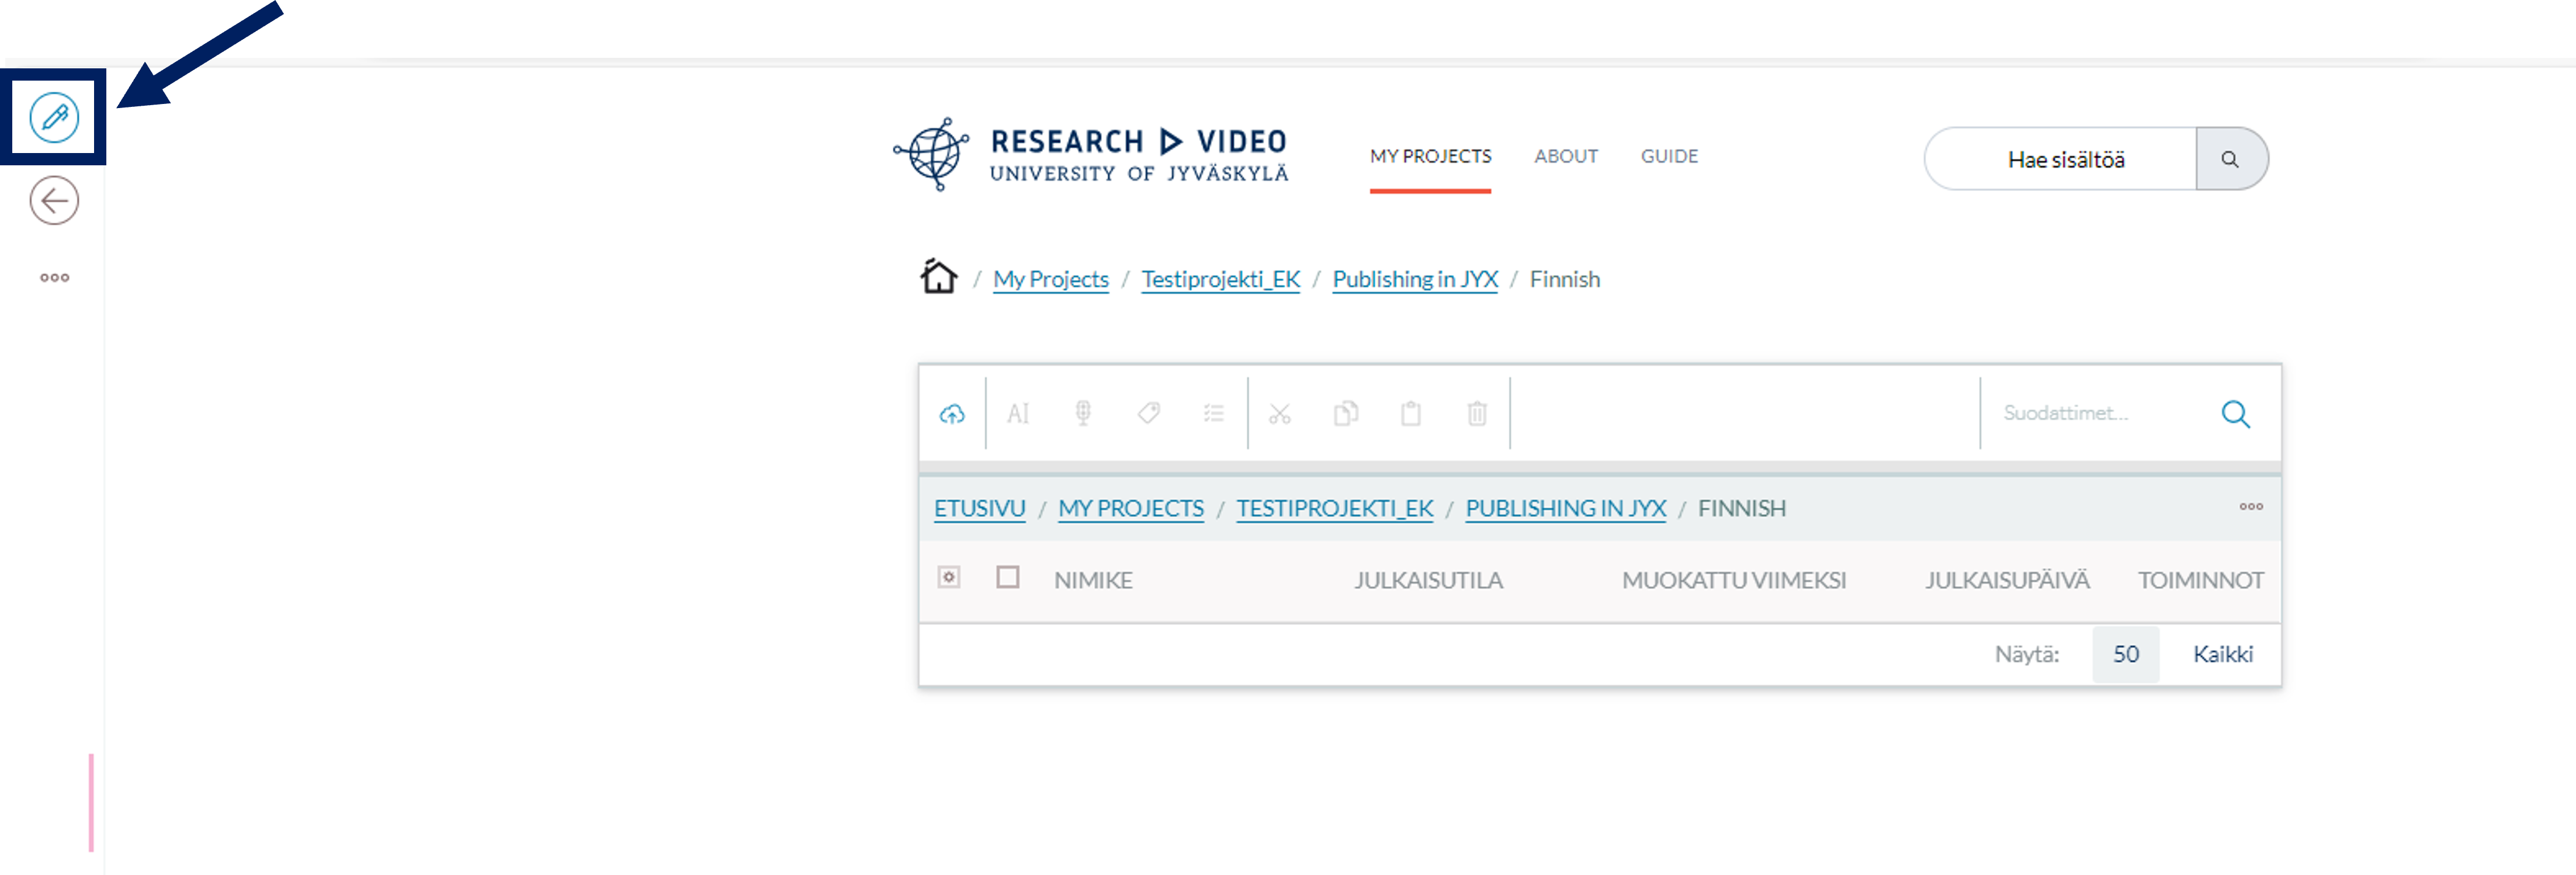
To edit media page, click the pen icon on top left corner.

When you click the video and press enter you will get first block under it. Pressing enter multiple times creates many blocks.
On the Media Page section of the right-side menu you can also edit the video information and e.g. add categorization tags, and set an expiration date for the video. Note: Leave the publication date field empty.

Selecting a text in a block opens a text editor over it:

Blocks can contain text, images, and other elememts. You may select different blocks from the + button.

Read more about the blocks in Plone Documentation https://6.dev-docs.plone.org/volto/user-manual/blocks.html.
D. Edit subtitles
You can edit the subtitles by doing the following:
- Go to the media page of the given video or audio file and select the edit option from the left side menu (see part C. Edit media pages)
- Play a video
- Select a subtitle file from the subtitle menu (marked with red in the following picture)
- Add or edit subtitles using the editor below the video. The subtitles are displayed in timecoded blocks that enable you to quickly replay a specific clip. Note: if the editor does not show, click the language of the subtitle shown below the video (English in the example picture)
- Remember to save changes.

A single video may have multiple subtitles.
E. View and export full subtitles/transcriptions
You can view a full transcription by selecting and viewing a subtitle from the Contents page available via the left side menu visible on your media page.

On the Contents page, select the subtitle you want to view. You can have several subtitle files, e.g. if you have auto-translated the transcription in the media file upload phase or if your project group has created several transcription versions.

Next, click the Edit button from the top left corner of the page
Tip: You can enlarge the transcription text box by dragging it downwards from the spot highlighted in the following picture

Remember to save the file after editing

Tip: You can also view the full subtitle by navigating to the View subtitle page

The View subtitle page looks like this

Export subtitle/transcription
You can copy the subtitle from here and paste it into a text file elsewhere. Please take care that the necessary precautions such as pseudonymization are done properly before this stage and that you select a suitable, secure JYU storage location for the transcriptions that contain direct and/or indirect personal information. You can use the dynamic help table for processing different types of confidential content (in Intranet Uno).
NB! If the transcriptions still need to contain sensitive personal information upon the export, make use of the dynamic table to check the needed data security measures in storing the files.
When in doubt regarding how to proceed, please contact the research data service team of Open Science Centre (researchsupport-osc@jyu.fi).
F. Logging out and editing profile information
You can log out of the service by navigating to the bottom left corner of the page. Logging out happens via the red log out symbol. From the selection

Admin instructions
Admins - Adding projects, users and setting permissions.